Friday, March 15, 2013
Blogging from A to Z Challenge
My good friend, Sangita, has asked me to join her in the Blogging from A to Z Challenge. For the month of April, I will be posting a blog a day. Since I doubt I can make 26 quilts in one month while maintaining my normal life, I'll focus on quilting techniques and other crafts I enjoy.
I really hope I can keep up!
Sunday, March 3, 2013
Lady in the Lake Baby Quilt
This baby quilt was a commission. I was surprised by the color choice: purple and gray. She also said that the theme was middle-eastern. I knew immediately that this would not be a "normal" baby quilt.
I always like trying out "new" blocks or patterns on a baby quilt. After digging through several books, I settled on a block called "Lady in the Lake". The pattern, though not strictly middle-eastern, was reminiscent of some middle-eastern designs I have seen.
I began picking fabric by finding the gray/silver/black swirly fabric. With that as a base, I tried to find fabrics that matched the color while sticking either to flowers, dots or swirls.
The pattern called for three primary fabrics and several secondary colors. Once I found the lavender and pink batik, I decided to use three purples, three grays and three gray on blacks. I had a hard time picking the third main fabric. Most of the grays in the store were just not a good enough match to the black/silver/gray swirl fabric. I experimented with violet and pink before finding this silver dot on white fabric. It was a nice way to add a little more sparkle in the quilt.
As I worked on the quilt, I started having doubts about how "adult" this quilt was. I went on a search for ribbon and lace to help soften it a bit. I found a black crocheted lace, and I was able to weave a lavender ribbon through the holes. As a final touch, I used more ribbon to place a bow in each corner (sewn down very well to avoid being a choking hazard).
I debated how to quilt it for quite a while. I looked at pictures on the internet, but I didn't see any quilting styles I liked. I finally decided to be bold and used a dark purple thread in the opposite direction from the diagonal block. It truly added another dimension to the quilt.
I truly took my time on this quilt, and it shows. I generally hate triangles because it is very hard to get the points to line up just right. Though I still don't care for doing triangles, I think this quilt was very nice. Nearly all of the triangle turned out perfectly. I have a very small list of quilts that I think were near perfect. I will often regret one of my fabric choices, or I will feel like I could have done a better job assembling or quilting it. This one is one of the rare ones without regrets and may be the best quilt I've made. It certainly makes my top 5 list. I'm eager to hear what both the client and the mom say about this one!
(Lady in the Lake, approx. 45 x 60, Feb. 28, 2013)
I always like trying out "new" blocks or patterns on a baby quilt. After digging through several books, I settled on a block called "Lady in the Lake". The pattern, though not strictly middle-eastern, was reminiscent of some middle-eastern designs I have seen.
I began picking fabric by finding the gray/silver/black swirly fabric. With that as a base, I tried to find fabrics that matched the color while sticking either to flowers, dots or swirls.
The pattern called for three primary fabrics and several secondary colors. Once I found the lavender and pink batik, I decided to use three purples, three grays and three gray on blacks. I had a hard time picking the third main fabric. Most of the grays in the store were just not a good enough match to the black/silver/gray swirl fabric. I experimented with violet and pink before finding this silver dot on white fabric. It was a nice way to add a little more sparkle in the quilt.
As I worked on the quilt, I started having doubts about how "adult" this quilt was. I went on a search for ribbon and lace to help soften it a bit. I found a black crocheted lace, and I was able to weave a lavender ribbon through the holes. As a final touch, I used more ribbon to place a bow in each corner (sewn down very well to avoid being a choking hazard).
I debated how to quilt it for quite a while. I looked at pictures on the internet, but I didn't see any quilting styles I liked. I finally decided to be bold and used a dark purple thread in the opposite direction from the diagonal block. It truly added another dimension to the quilt.
I truly took my time on this quilt, and it shows. I generally hate triangles because it is very hard to get the points to line up just right. Though I still don't care for doing triangles, I think this quilt was very nice. Nearly all of the triangle turned out perfectly. I have a very small list of quilts that I think were near perfect. I will often regret one of my fabric choices, or I will feel like I could have done a better job assembling or quilting it. This one is one of the rare ones without regrets and may be the best quilt I've made. It certainly makes my top 5 list. I'm eager to hear what both the client and the mom say about this one!
(Lady in the Lake, approx. 45 x 60, Feb. 28, 2013)
Wednesday, February 27, 2013
Playing with Prezi
For a technology class, we had to make a presentation on a hobby in Prezi. I had lots of fun doing it, so I thought I'd share it here.
Quilting With Sew Honeybee Prezi
Friday, December 21, 2012
My Little Pony
Here is another commissioned quilt. My brother wanted it for his little girl (she is a 2 year old Shiba Inu, so the fluffy kind of kid). Again, this is a licensed (copyrighted) fabric, so I only make quilts of this nature for gifts or on commission. I am a quilter, not a "My Little Pony" dealer. :)
I love my kitties, but all too often, they like to help. This is what happens when I take a break and go to the bathroom.
My brother prefers quilted rather than tied quilts. With a doggie blanket, this is especially important; they have a tendency to chew off the ties. With this particular quilt pattern, I normally prefer to do a diamond in square quilting on all the blocks. But this time, I thought it wouldn't look very good. I was not able to completely center the fussy-cut ponies because I didn't have enough fabric. I didn't want to quilt through the ponies. It would cause them to look even further off center. My solution was to follow the center purple block in more of a plaid design.
Right before I went around the final edge, I noticed that my thread was really low. This is the equivalent of a thriller/suspense movie for a quilter... Would I make it? Would I have to run to the store to finish my quilt? What if I almost make it and it looks bad when I switch to the new thread? What if the store doesn't have the right color thread anymore? (When did I buy this spool? Was it five years ago or ten?) Then my bobbin thread runs out. Fortunately, I am using purple on the bottom, so I reloaded my bobbin and continued. Toward the end I held my breath. Two feet... one foot... eight inches... and done.
Made it by the skin of my teeth. How exciting!
The final quilt. This is the pattern "Little Sailor's Dream." This is becoming one of my go-to quilt patterns. So often, people want a quilt that features something. This quilt pattern lets me put whatever that something is in an otherwise empty block and still do a pieced quilt. It also has a nice number of accent colors. I really like the three tilted stripes. It's easy to do, but looks really fun.
(Little Sailor's Dream, 38"x 45", December 20, 2012)
Tuesday, December 18, 2012
Jewel Tone Quilt Part 2
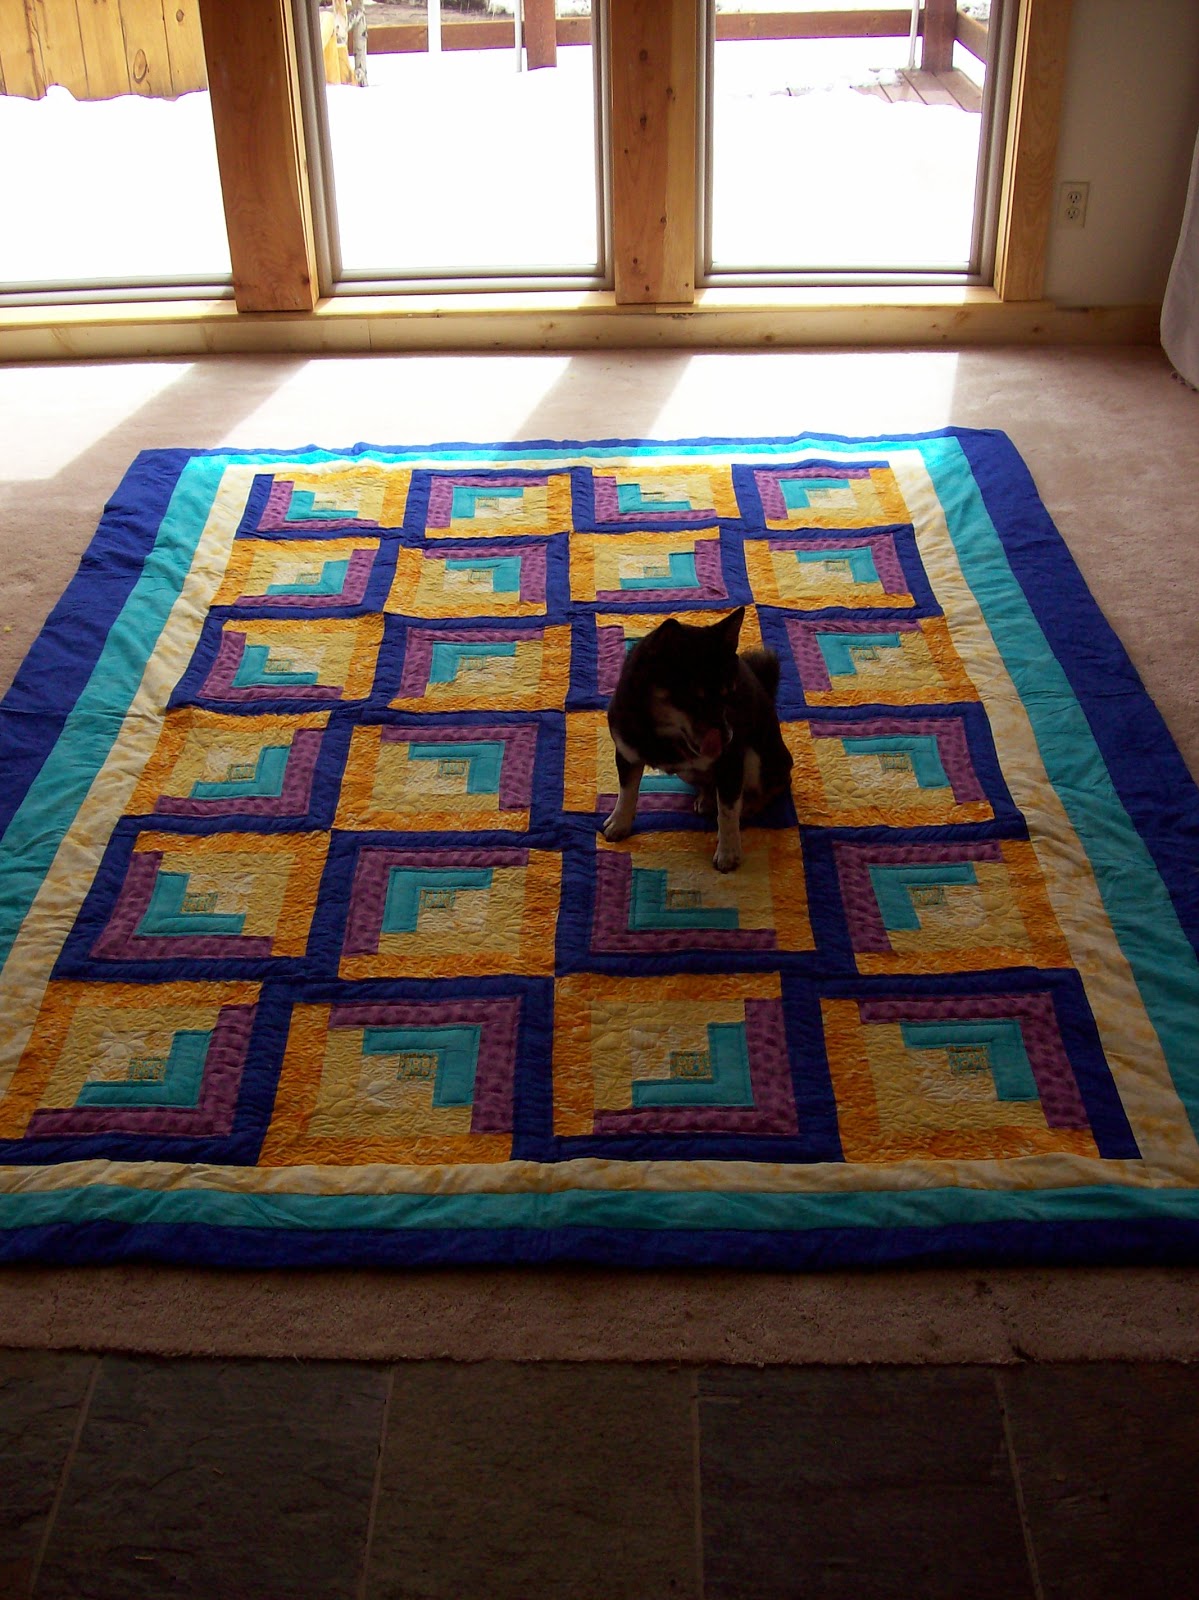
If this Jewel Tone quilt looks familiar, than you've been following me for a while. This has been one of those projects that just sat and sat. I bought the fabric in 2002. I finished the top and started the stippling in 2006. Then it sat. I finally just finished the quilt this past May.
Why did it take so long? Because stippling a large quilt on a normal machine kinda sucks. On the plus side, I love the look, so it really was worth it in the end.
Hoshi photo bomb. She stays away until she can be in the way. Then she jumps all over me and licks my face.
The final look. I really like the pinwheel layout of the log cabin blocks. It makes a super cheerful quilt.
Why did it take so long? Because stippling a large quilt on a normal machine kinda sucks. On the plus side, I love the look, so it really was worth it in the end.
Hoshi photo bomb. She stays away until she can be in the way. Then she jumps all over me and licks my face.
The final look. I really like the pinwheel layout of the log cabin blocks. It makes a super cheerful quilt.
Monday, December 17, 2012
Retirement T-Shirt Quilt
This is the quilt that actually caused me to make the other T-shirt quilt. I owe both the commissions to my aunt, who suggested the idea to her office.
School Psychologists play a special role in public education. They work with the parents, students and teachers to help students grades pre-k to 12 with special needs. They go from school to school, testing students and helping create individual educational plans designed to tailor-fit each of the children they help. For this retirement, each school sent one t-shirt for the quilt as a reminder of all the schools and students he helped.
With so many t-shirts and so many colors, this quilt was much harder to arrange than the other t-shirt quilt. They requested education-themed fabric. Apparently, April is not the season for education-themed fabric. I really wanted the black and white chalk-board fabric I had seen a while ago, but I couldn't find it anywhere. Even the internet failed me on this one. Instead, I went for a black fabric with rainbow letters and numbers. It was a bit busier than I like, but it was truly my best option.
I hadn't originally planned on adding a white border, but when I laid everything out, the quilt needed some separation between the letters and the cute school fabric. With all the colors shouting for attention, white was really the only solution. It adds a nice picture frame look to cap off the t-shirts.
I fussy-cut the final border and lined up the fabric with its repeat so I wouldn't cut any of the little motifs in half. I also planned the border so that the design was always right-side-up just in case this quilt ended up on a wall rather than a bed. I finished it off with white ties and a narrow band of the black backing fabric around the edge. Again, I was asked to make whatever size worked. It ended up fitting nicely on a king sized bed, though it did not have the extra pillow-tuck room.
I was pressed for time, and the quilt arrived in the mail on the day of his retirement party. I was told there was lots of oohing and aahing over the quilt, and Ralf was very touched at the thoughtfulness of his gift.
School Psychologists play a special role in public education. They work with the parents, students and teachers to help students grades pre-k to 12 with special needs. They go from school to school, testing students and helping create individual educational plans designed to tailor-fit each of the children they help. For this retirement, each school sent one t-shirt for the quilt as a reminder of all the schools and students he helped.
With so many t-shirts and so many colors, this quilt was much harder to arrange than the other t-shirt quilt. They requested education-themed fabric. Apparently, April is not the season for education-themed fabric. I really wanted the black and white chalk-board fabric I had seen a while ago, but I couldn't find it anywhere. Even the internet failed me on this one. Instead, I went for a black fabric with rainbow letters and numbers. It was a bit busier than I like, but it was truly my best option.
I hadn't originally planned on adding a white border, but when I laid everything out, the quilt needed some separation between the letters and the cute school fabric. With all the colors shouting for attention, white was really the only solution. It adds a nice picture frame look to cap off the t-shirts.
I fussy-cut the final border and lined up the fabric with its repeat so I wouldn't cut any of the little motifs in half. I also planned the border so that the design was always right-side-up just in case this quilt ended up on a wall rather than a bed. I finished it off with white ties and a narrow band of the black backing fabric around the edge. Again, I was asked to make whatever size worked. It ended up fitting nicely on a king sized bed, though it did not have the extra pillow-tuck room.
I was pressed for time, and the quilt arrived in the mail on the day of his retirement party. I was told there was lots of oohing and aahing over the quilt, and Ralf was very touched at the thoughtfulness of his gift.
My first T-shirt quilt
It's always fun to try something new. When I worked at Jo Ann Fabric, I often helped customers pick out the correct materials to make a t-shirt quilt and explained the steps. I'd read about them and seen them, but I hadn't actually done one. My customers would often thank me for the help and show me the finished result (North Dakota is a friendly place like that). I always felt a bit like a sham for teaching about the quilt without actually having made one. Now I can say that I've done it, and it was more fun than I thought it would be.
The first step is cutting out the t-shirts. I started with a rough cut where I removed the sleeves and collar then cut the back of the shirt off. I started with the largest design and based the size of the blocks on its width.
Some of the sleeves had designs and some of the shirts had a small logo on the front of the shirt with a large logo on the back. I cut these designs so they had about an inch of fabric around the design.
The next step was adding a stabilizer to the t-shirts. I used woven fusible interfacing because t-shirts are naturally stretchy. If they were not lined with a woven fusible interface, they would stretch and bunch, making the quilt look really bad, especially after washing it the first time.
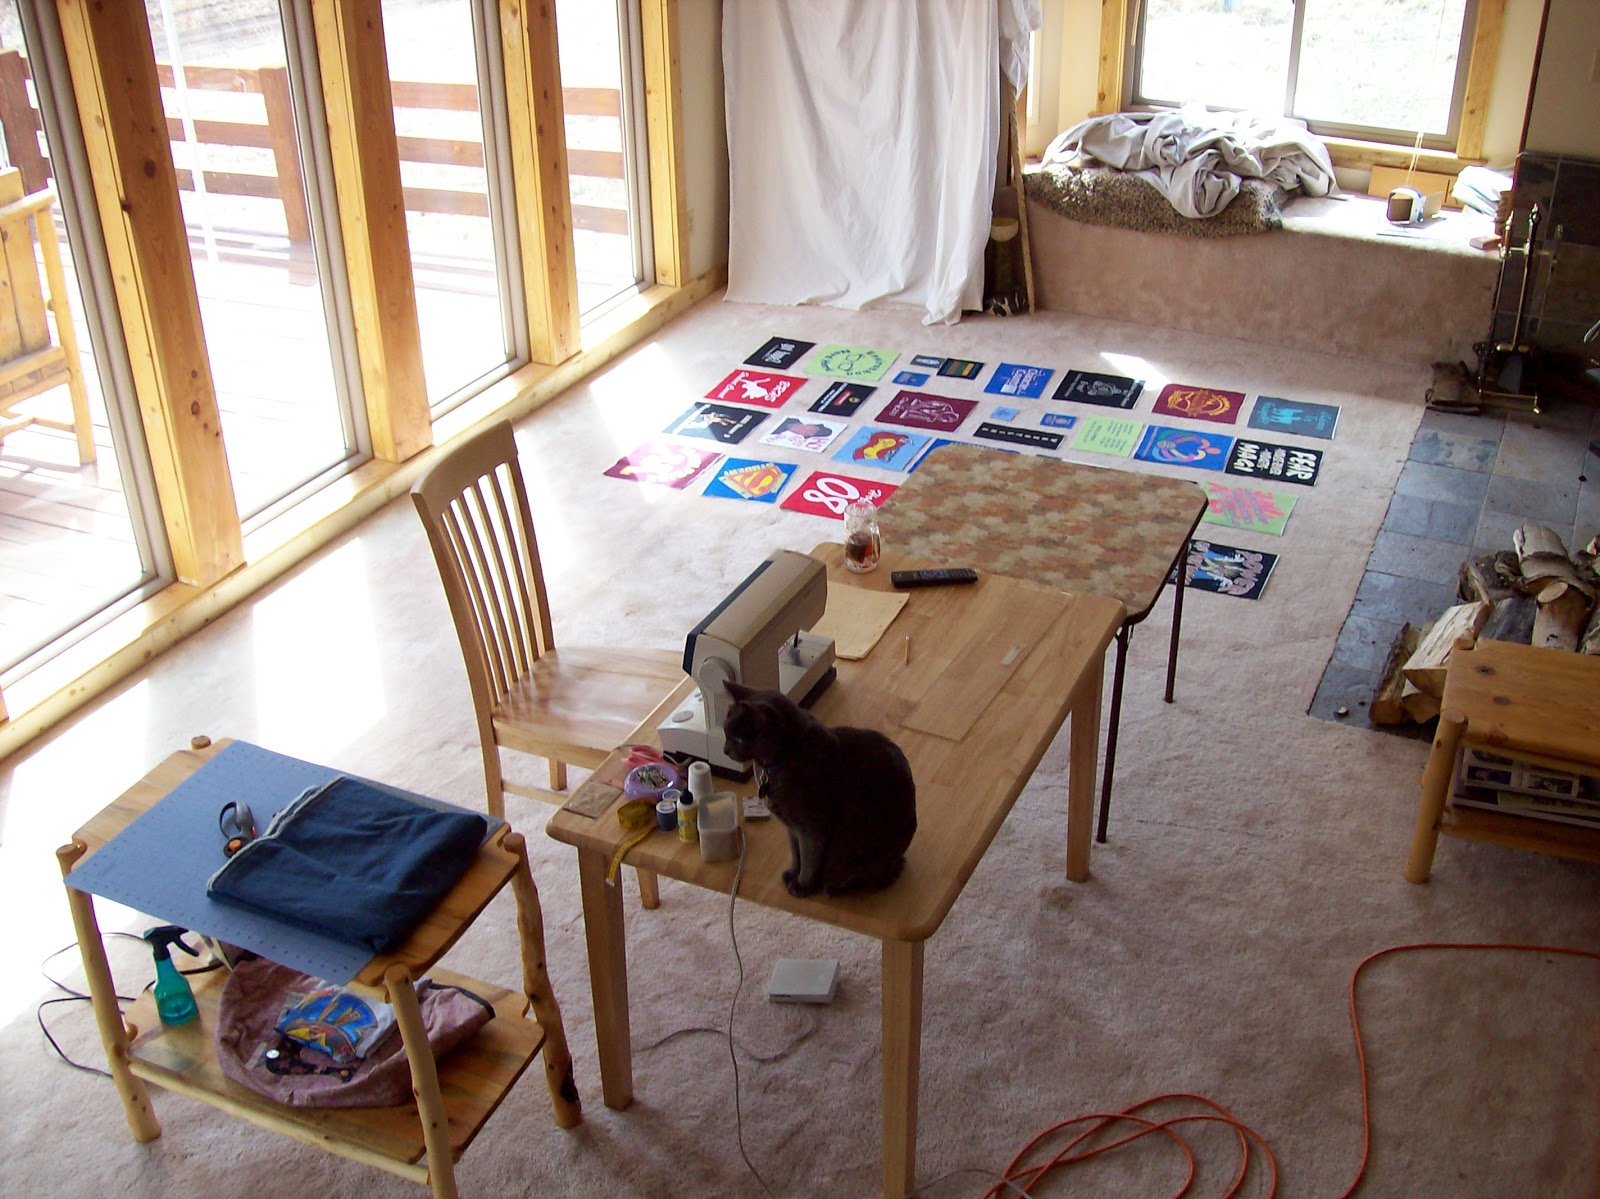
Once I had all my blocks ready, I headed out to my dad's cabin in Westcliffe. He has a huge living room, and I love laying out quilts there. The natural sunlight is also great, so it's worth the two-hour drive to sew in a fun location. I arranged the blocks in four lines. All of the large blocks had the same width, so it was rather easy to make the lines work. I did have to shuffle the blocks quite a bit to get them all the same length and avoid putting two similar colored t-shirts next to each other. I have to say, I got really lucky because I was able to get all the lines of blocks within half an inch of each other.
My sewing buddy Merlin made sure that I did it right. He is a great supervisor, but he does sleep on the job quite often.
I used denim to tie all the colors together, because what better to put with a t-shirt quilt than jeans material? I also found a maroon home-spun fabric to use as an accent. Since this was a high school graduation gift, the school colors of maroon and gold were also very important.
When I asked what size to make the quilt, I was told to make it whatever size worked with the t-shirts. It ended up working out as an extra long queen. I like making extra long quilts so there is pillow-tuck room. I also thought it would be nice to have an extra long quilt for this very tall, soon to be college student. He could curl up from head to toe without a problem.
I don't own a long-arm quilting machine, so machine quilting a quilt this large is problematic. I also think that the rustic fabrics mixed with the t-shirts would look better with a tied quilt. I used gold yarn as a little pop of color and a nod to his school colors. They were thrilled with the quilt, and I have to admit I was really happy with the final result.
Thursday, December 8, 2011
A Splash of Color
This quilt was never meant to be a quilt. I got the fabric to make grocery sacks, and though they are the same fabric print in two different colors, I had not intended to put them together. It's a little bit on the holy-cow bright side for my taste, but I would be willing to bet that someone will find it to be their cup of tea.
This fabric posed an interesting challenge. All four pieces were variegated, but the way it was printed would cause the variation to show up from strip to strip rather than in a single strip if I cut it the way quilters typically do. Basically, I had to cut the strips with the grain rather than across the grain. This meant that the border has a lot of piecing to it, as I only had about half a yard of each fabric. Fortunately, the fabric design hides all the extra piecing.
TESSA is the group I donate my quilts to now, and their drive ends tomorrow. I had hoped to finish all of these quilts last month, but a bad cold kept me from quilting until yesterday. I had them mostly done, but it was a scramble to finish all 5 quilts in 2 days. I truly hope that the families who receive these quilts and the other crafts I am sending have a happy holiday season.
(Stripe Block, approximately 32 x 54, Dec. 8, 2011)
Sleeping Lambs
I got the lamb fabric to make a quilt for a baby a friend was having. I moved and lost touch with her in all the craziness of starting my new job, and it is amazing how quickly ten years pass. Even if I were to find her again, somehow I don't think her son would want little sleeping lambs on a quilt.
I did manage to make this quilt from scraps, but it was a lot harder. The blue and teal both are lovely, soft colors, but are not at all the typical baby colors, and therefore had to be matched with regular calicoes. Fortunately, periwinkle is one of my favorite colors, so I did have a fair number of scraps to choose from. You may also recognize the brown "baby" fabric from Landon's Monkey Quilt.
I made a chenille teddy bear a few years ago, and I had a few scraps left as well. I happened to stumble on them while digging through the recesses of my fabric dresser. The color was right, and I love adding in textured fabrics to make baby quilts a little more interesting.
Again, a ribbon adds a finishing touch before it goes to TESSA.
(Block in Block, approximately 34 x 52, Dec. 8 2011)
Ballet and Princesses and Fairies, Oh My!
So, the fabric from this quilt has a little of everything girls like. About all it's missing is a white pony. This is another stash quilt. I am fairly sure that these two fabrics were a set, but finding anything else to go with them proved to be an issue. The border, pink roses, ended up being a fairly good match from my stash.
I had enough fabric to partially fussy-cut the girls. I wasn't able to position them vertically, but I was able to center them horizontally. I took turns putting the girls either high or low in the block, creating a little of a pattern, though it seems a little random too.
I also have a fairly large collection of lace and ribbon that I was looking to reduce. This eyelet seemed like a nice match and helped add a little interest because I use so few fabrics. The ribbon is simply to help package it as a gift.
(Long Blocks, approximately 30 x 50, Dec. 8, 2011)
Wednesday, December 7, 2011
New Look, Part 2 Bonus: Sand & Seaglass
I dug through my photos, took some new ones and played even more with the style of the page. Now the background is actually a quilt I made. I also decided to stop being so shy and post my picture rather than the sewing machine. I think I am done tinkering with the blog look for now, but who knows what will happen if I make a new favorite quilt.
I was going to link the quilt I used and came to the shocking realization that I never blogged about it. I love miniature quilts and this one is one of my all-time favorites. I picked the colors based on the theme "Sand and Seaglass." The block is "Amish Shadows" though I greatly reduced it. The strips of color are just under 1/4" giving the over-all quilt a 6 1/2 x 8 inch size.
I knew that I would frame this quilt as I was designing it. I consider quilts of this size to be artwork rather than functional, so I chose the shadowbox as I picked the fabric so everything would match. I used variegated brown and gold lamé thread for the quilting. The cream fabric and striped also had some metallic gold highlights, thus tying everything together. This is one of the quilts I donated to Joyful Heart Foundation, and I believe they chose to hang it in their cooperate office.
I was going to link the quilt I used and came to the shocking realization that I never blogged about it. I love miniature quilts and this one is one of my all-time favorites. I picked the colors based on the theme "Sand and Seaglass." The block is "Amish Shadows" though I greatly reduced it. The strips of color are just under 1/4" giving the over-all quilt a 6 1/2 x 8 inch size.
I knew that I would frame this quilt as I was designing it. I consider quilts of this size to be artwork rather than functional, so I chose the shadowbox as I picked the fabric so everything would match. I used variegated brown and gold lamé thread for the quilting. The cream fabric and striped also had some metallic gold highlights, thus tying everything together. This is one of the quilts I donated to Joyful Heart Foundation, and I believe they chose to hang it in their cooperate office.
Tuesday, December 6, 2011
Dishwasher Doggie
So this isn't sewn, at all. I tend to do the loading of the dishwasher, and other family members tend to unload. Since we don't need to run it every day, this leads to confusion at times. I wanted a magnet that said "clean"/"dirty" but magnets don't stick to the dishwasher. I had this unfinished wooden cut out of a dog, so I decided to paint him as a solution to the problem.
I was originally going to have the dog with a "clean"/"dirty" sign, but my brother suggested just making the dog clean or dirty. I thought it was a cute idea and went with it. I like it, and thought you may too.
Pooh Baby Quilt
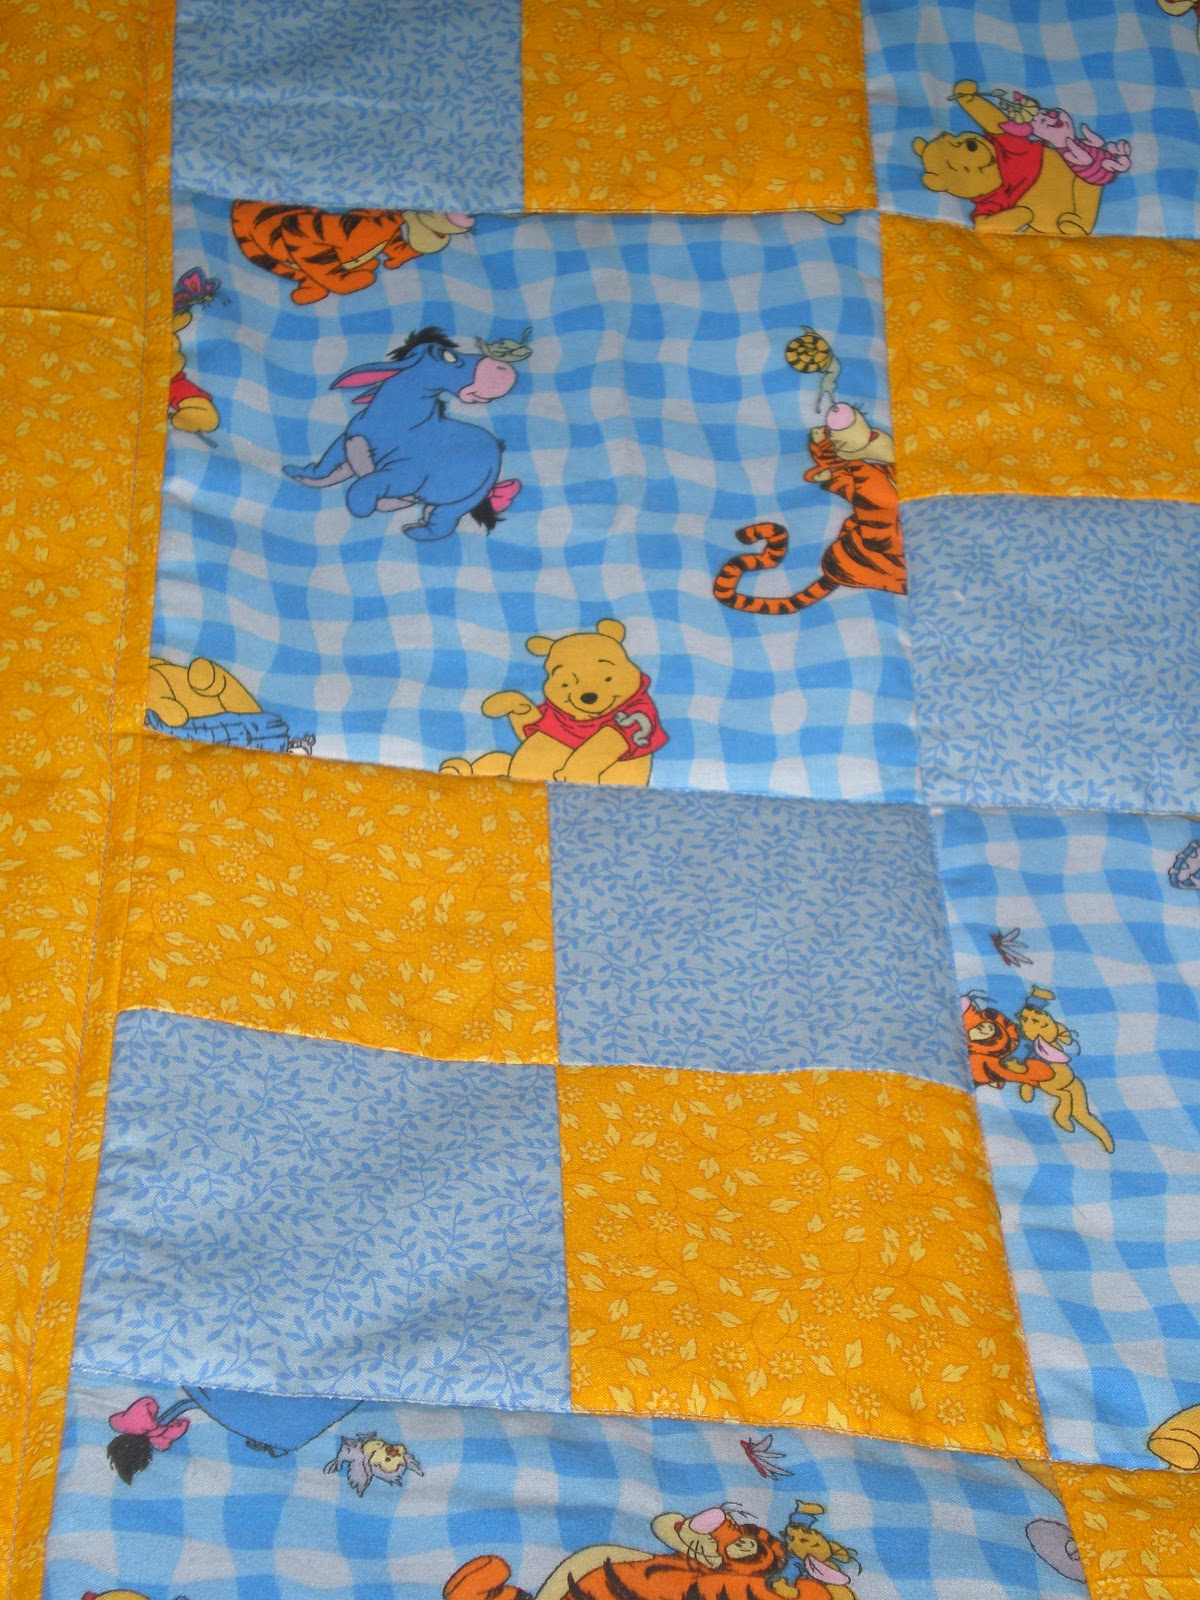
I don't know how long I've had this Pooh fabric. I think it's been at least 10 years. I was always going to do "something" with it, but it just sat on my shelf. For a while, I was reading about and talking with quilters who had a "stash" of fabric and I was convinced that I needed to collect fabric too. I worked in a fabric store, so I saw both the newest, hottest fabrics and the best sales (as well as my employee discount). Needless to say, I started my own stash. Lately, it is annoying me. I have a few pieces that I bought large quantities, but most of my stash is in 1-2 yard pieces. At the time, I thought that would be plenty, but I have found that to have the flexibility to place the fabric in the position in needs to be within the block is paramount, and these little pieces are often too small. My other problem is that I am very, very, very careful about patterns and colors when I design a quilt. Far too often, my stash is the wrong color, the wrong pattern, the wrong size of pattern, etc. My other problem is that to get it in a quilt, I either need a way bigger stash so I have more choice (not gonna happen, too much $ and space) or I need to take all of it with me when I shop for a specific quilt. I don't mind taking swatches into a store, but the level of playing and finagling involved when I have a quilt idea would require the whole piece. I just don't like bringing strange fabric into a store and dealing with the employees who want to charge me for it or look mad for daring to match another store's fabric to their own (to be fair, not all shops are bad, but enough are that I just don't).
So, back to Pooh. Both of these fabrics were in my stash. I resolved to make quilts from my stash and press my creative luck. I managed to make four so far, and the rest will be showing up here soon, as I finish them.
I kept the block design and quilting rather simple. Given that I had limited amounts of each fabric and that I wanted to use it up, I felt that a nice chunky block would be fun with the wiggly woven print of the Pooh fabric.
Oh, another random rant, if you'll read it. Lots of fabrics are copyrighted. As a composer and a member of ASCAP, I truly believe in following copyright law. The Pooh fabric actually has printed "for home use only, not for resale." When I see that on fabric, I truly try to abide it. I would not sell this quilt for that reason. I make my money selling quilts because of the artistry and work I put into my quilts, not by the fact that they have a logo that someone will buy. I will do special orders with this type of fabric, but only because then the client is buying and choosing the materials, and I am simply a seamstress finishing it for their own home use. I've seen lots of people on Etsy and at craft shows who do not adhere to copyright laws, but I do hope that word will spread and people will stop buying the copyrighted items.
(Pooh Blocks approximately 36 x 48, Dec. 6, 2011)
Ballet Bear
This was another "quilt" kit. I use the quotes because it is not pieced or appliqued, but rather two pieces of fabric quilted together with batting between. In my mind, which I can't say is standard, I don't think of something as a "Quilt" unless the top has several pieces of fabric. To me, this is a "quilted blanket" much like the comforters they sell in stores.
The design was rather fun, so I chose to simply bring out the details in the stitching. I used clear thread because there were too many colors to be practical and a lot of the colors were not standard thread colors.
I mostly stitched around the outlines, but there were a few details I stitched as well such as the lines on the butterfly wings and the stippling in the ballet slippers. Both places helped add a little more 3D to this flat design.
Several times, I almost sewed on lace, ribbon roses, ribbons and flower-shaped buttons. I think it would have made the quilt more interesting, but I decided against it in the end because they are all choking hazards, and the quality of the print was not mount-on-the-wall artistic.
(Quilted Blanket, approximately 30 x 42, Dec. 6, 2011)
New Look
I made this stamp logo for Sew Honeybee before I ever did anything on this blog, then I never used it. I always thought it was rather cute, and I've been meaning to use it on my computer. I have a bunch of crafts that I am getting ready to post on, so I thought I may as well do the updating before I blog about my new projects. I've actually been doing a lot of sewing since my last post, but my camera has been super flaky and has uncharged batteries at an astounding rate, even while not on. So, hopefully I can get enough AA batteries to take pictures of all the projects from the last few months.
Oh, by the way, for the record the background image is not a quilt I made. I'm going to try to take a picture for the background, once of course, the camera is cooperating!
Subscribe to:
Posts (Atom)