Thursday, June 4, 2015

100 Posts

This is post 100, so it just feels like I should do something different. I was going to do a top 10 list, but I couldn't pick only 10 and doing many categories was clunky, so I've decided that I am going to post a random selection of my favorite projects.


This was my first and only scrap quilt. It is queen sized, and I really enjoyed making it. I have plenty of scraps and really should make another. I donated it to the Joyful Heart Foundation.


This quilt (which I use for my background) is a mini quilt and is only 6" by 8". I loved the fabric and loved how it turned out framed. This one was also for the Joyful Heart Foundation.


This was a baby quilt for a first time mom who wanted to have something in gray and lavender that was somewhat inspired by India. I loved that it was such a non-traditional baby blanket, and I went overboard on making it perfect. This may be my all-time favorite thing I've made.


Like the mini quilt, I just love this color combo. I thought this purse turned out really nice with all the extra embroidered details.


I've been meaning to post this, but haven't gotten around to it yet. Landscape quilting is rather different from normal applique, and I always wanted to try it. I really love doing it, and this may also be one of my all time favorite things.


This was the first time I tried doing applique on a tunic. It was in an auction for Darkmoon, and I still need to give a post for it.


Stained glass quilting is super cool, and I love the look. I am also a huge fan of Celtic knotwork.


 I loved that these wings used so many different skills. It isn't often that basket weaving, crocheting, beading, wood carving and floral all go together. It was a fun and imaginative project.


I haven't posted these yet either. They are spell balls made by using the Temari hand embroidered method. It has become a new favorite craft for me.


During chemo, I spent a fair amount of time doing zentangles. It was about the only thing I had the energy to do because even holding a needle and cross stitching was too hard and took too much brain power to count. I have a book full of tangles, and this was my favorite.


This was my very first super mini quilt. I wasn't even sure it would work. I love the colors and how they blend, so I ended up making this quilt 3 times... once as a tester wall hanging, once as a king sized bed quilt and finally as this super mini sample.


This was not my first wedding dress, but it was the first time I set out to make a wedding dress. The other wedding dress I made surprised me. I made the dress and found out later that she liked it so much she got married in it. This wedding dress was really fun. It isn't too often that a bride is so interested in having that much color. I really love how it turned out, and she was thrilled.


It is so hard to just stop there, but there are just too many things that are cool.

Wednesday, June 3, 2015

Best of the Best ~Old Garb Part 6


A week before Rakas, I learned that there was a contest called the Best of the Best where you can enter only one item. I thought I should give it a try, so I made this dress in about 30 hours.


It is all one piece, with a grey liner.


 I took the time to hand embroider the diamonds and pearls across the top.


 Gauntlets attached by ribbons.


The back. The bullion fringe is  a little annoying because it is not colorfast. I discovered this when I spilled coffee on the dress as I was working on it. So, in the future, Dry Cleaning!


First Field Garb ~ Old Garb Part 5


When I learned about amtgard, I wanted to have field garb right away. I planned on playing a bard and wanted to have something that was in light blue because the bard class uses a light blue sash. This was my first time making a tabard, and I both over did it and under did it. 


I took the time to hand embroider my new heraldry, officially "Fix: Azure, upon a Tree of Life, a chalumeaux palewise, proper". 


My main beef with this tabard is that I shortcutted the ribbon. I sewed the green right down the middle rather than taking the time to do both edges. I have been tempted to rip it out and redo it, but I haven't gotten around to it. I also find that the lace doesn't wash well, so I have to iron it if I want it to look nice.

Gypsy Garb ~ Old Garb Part 4


I made this for a Renaissance festival. I wanted something cooler and that people would not step on. The crocheted scarf is not something I made, but it looked so good with the outfit it looks naked without it. I certainly could have made it, but that would be very time consuming. As it is, I may end up remaking a large section because my dog decided to chew off a couple dozen beads. It will pull apart if I don't do something to fix it.


This was my first time making a "real" corset. What I mean by real is that it has metal boning and will in fact do the corset thing of sucking in everything rather than the plastic boned corsets that will rip apart if you pull too hard. I made the pattern after looking at a friend's over bust corset. I wanted an underbust corset, so I made many modifications as I created the pattern. 


At the time, I could not afford to get a proper busk, so I made it without one. Sadly, it makes this corset a pain in the ass to wear. I have to restring it basically every time or go with super long cords so I can shimmy it on over my head.


Here is a back view, though I was lazy and didn't bother cinching in my dressmaker's dummy.

Lady Greensleeves ~ Old Garb Part 3


I made this one for Halloween 2008. Again, I love huge sleeves, so I fell in love with this pattern.


After the purple dress, I knew that the sleeves would have an ugly seam down the middle of the inside, so I lined the sleeves in white. I found a roll of lace at a store for $10 and it easily has 100+ yards. The smaller lace had about 25 yards. Both of these laces now often appear in my sewing. It was a great buy, and I still have so much left it's ridiculous.


I wore this to my first amtgard feast, and I am shocked no one gave me a hard time about the belt. For those not in the know, white belts signify that you are a knight and the color that they are trimmed in signifies the field. This belt looks like a knight of the flame belt... one given for service to the club. Since I learned that, I tend not to wear the belt and go with a corset instead. Maybe someday I can wear it. We'll see how far I get in amtgard.


This is my only garb with a train. I love it, and it looks great, but it gets really dirty and often gets stepped on. I really should do this pattern again. I love how it fits and feels.

Blue and Gold Renaissance Dress ~ Old Garb Part 2


I made this one a few years later for a madrigal dinner. I think it was around 2005. We sung songs and I played clarinet and recorder and such.


I had fun with this trim. I also really love the hammered satin (aka crepe backed satin).


I never properly hemmed this dress due to time constraints, and then I realized that the fabric would never ravel (it is a microsuade), so I didn't bother after the event was over. It looks a bit crooked on the dummy, but it is good when I wear it.

Purple Renaissance Dress ~ Old Garb Part 1


So, I don't have many pictures of my tailoring, so I am going to flood a bit with things I made long ago. I made this dress for Halloween around 2000.


I loved the pattern because the sleeves were so cool.


I also love that it doesn't seem to matter how much I change in size. It always fits. The fabric is also  silky and nice. It was one of my first times using bias tape, so the vest is a bit off. I know it was the first time I tried grommets. Notice that there aren't any left. I majorly mangled them and they have since departed. I should add some in again given how often I wear it.

Tuesday, June 2, 2015

Hardanger Hankie


I spent most of the day on hold, so I broke out the hardanger project I am working on. It is a handkerchief, but this one has a special purpose. I won't give it away yet, but I will give a hint that I will be making two. My labels are a hint as well. I still need to do cutwork in the diagonals and add in french knots and seed beads. I think they will be quite lovely when I am done.

Monday, June 1, 2015

Dice Bags


I made a bunch of dice bags for the con. Some of the ones with cooler fabric sold rather well. I broke my rule on normally not making things with licensed prints for resale, but I checked for copyrights on these, and I think they were okay for resale.


I also made some with a steam punk theme. The vintage one went to someone who loved it, so that makes me very happy!


Short post, because I am so tired after the con.

Saturday, May 30, 2015

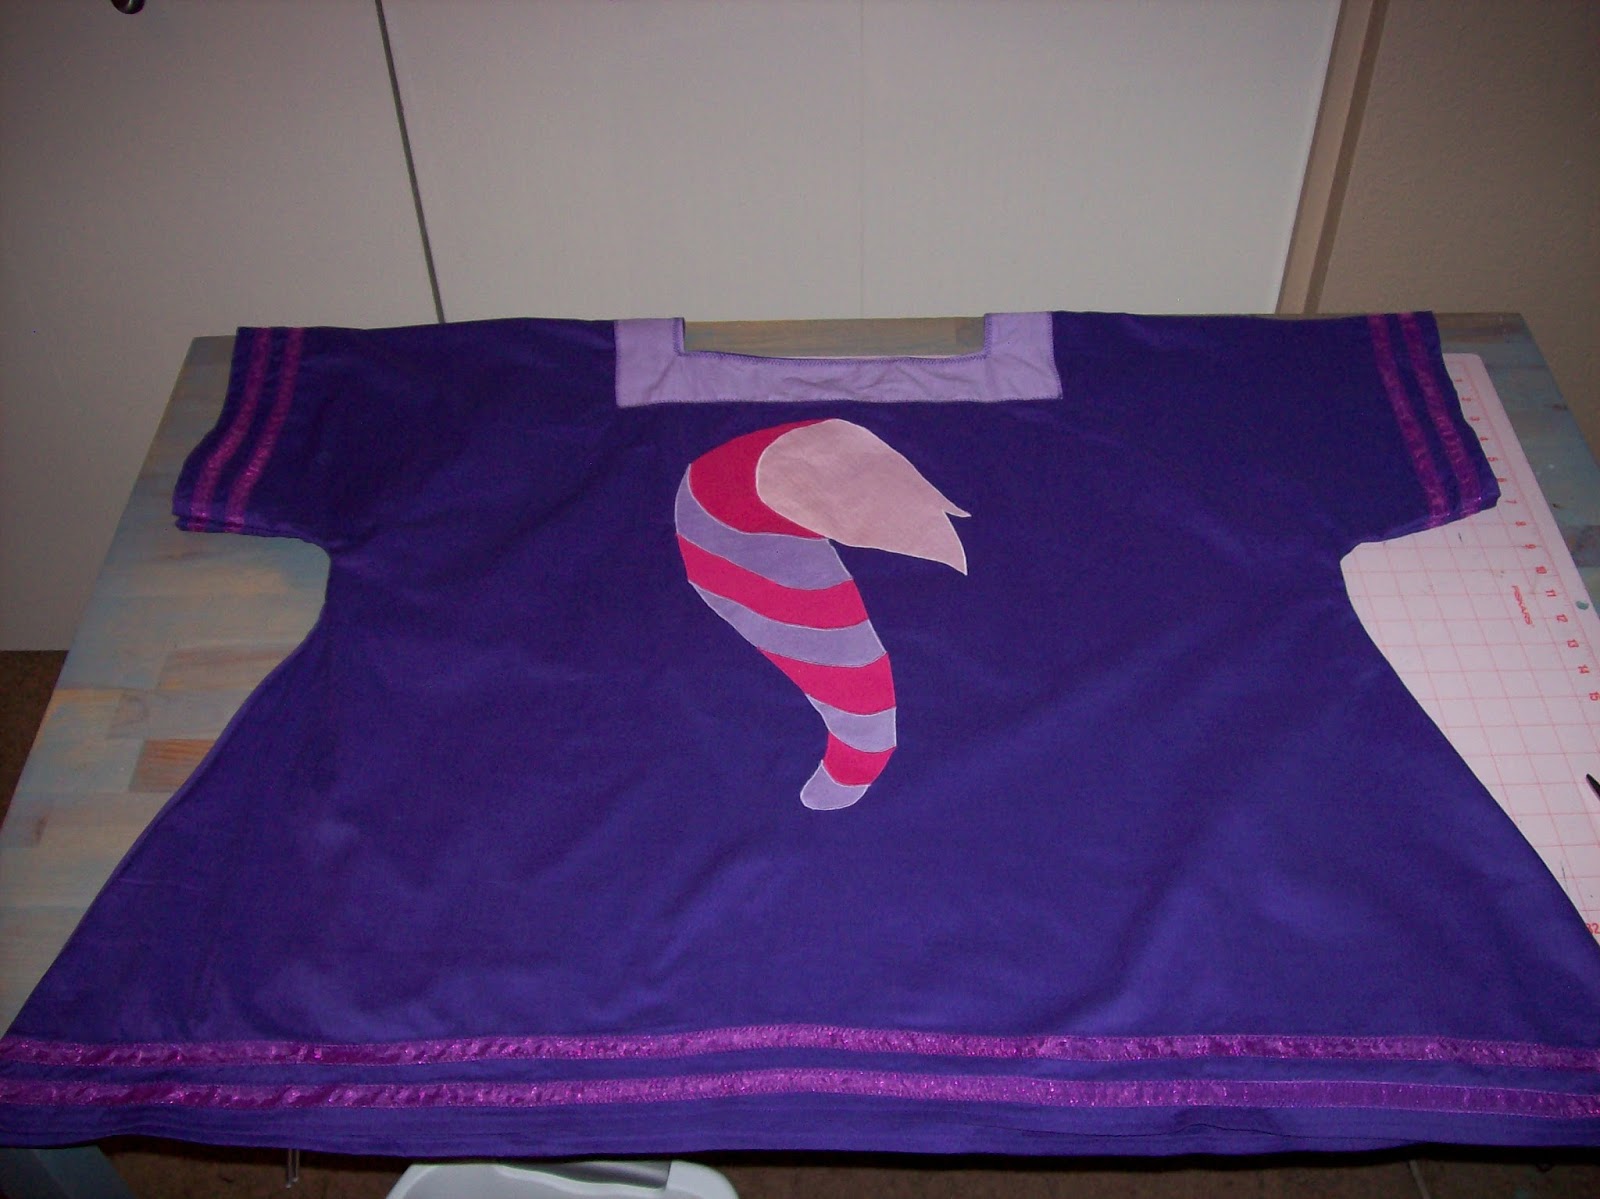
Cheshire Cat Tunic

The upcoming reign in Iron Mountains will likely be Alice in Wonderland themed (the person is running unopposed and the vote is not yet done), so I made this tunic to celebrate the theme.


 I tried a new technique on the mouth, and it worked okay... I still need to work on it.


The organza ribbon on the sleeves and the bottom was more difficult than I anticipated. It didn't want to stay in the right spot. Pins didn't seem  to help, which I find odd.


 I placed the tail so it would hit the belt line.


 Anyway, fun times with a tunic! I will try and sell this at the comic con, but so far I haven't had much luck with the con.


Friday, May 29, 2015

Shield Cover


This was another crafting game project  This is my write up:


Bias tape is super cool because it can do things that fabric not cut on the bias can't. I took advantage of this fact when planning my design. It has an amazing ability to do curves while remaining flat, and with a little pleat, it can also do a nice sharp angle. I chose to do a shield cover because I currently had a lame shield cover, and because it was a nice round object that would show off the cool bias tape techniques. I used three different kinds of bias tape in this project. I had a specialty quilting bias tape (the black one) left over from a project, some regular white 1/4" doublefold bias tape left over from another project, and I cut my own bias tape from a dark blue cotton fabric from my stash.


I started by tracing my design onto the blue background fabric (left over from a dress I made). I pinned the black bias tape down, but it looked too mono-chromatic, so I pulled up all the pins and added a brown and a green fabric underneath (both from my stash).


 I used heat-n-bond (from my stash) to secure the fabric and then re-pinned the black bias tape in place. I ironed down the bias tape in sections, smoothing out all the wrinkles and adding in pleats for the sharp corners and sewed a scant 1/8" seam on both sides of the tape.


Then I measured the cover against the bevel in my shield and through math and fabric pencils marked where I would add the blue border. 


I cut the blue fabric on the bias in 7/8" strips and backed them with heat-n-bond.


 I cut off part of the white double folded bias tape to turn it back into singlefold bias tape and used Steam-a-Seam to turn it into quilting bias tape. Then I pinned the white and black bias tape over the blue bias tape and ironed everything down. I sewed a scant 1/8" seam on the black and white bias tape, going through the blue bias tape as well. 


I finished the cover by sewing two strips of blue fabric to the cover and using a drawstring and toggle stoppers to pull it tight. The shield cover will well outlast the shield now, so I made it compatible with any max small round shield, up to 4" thick. 


The technique I used is commonly referred to as "stained glass appliqué" because the project resembles stained glass when finished. I tried to use a minimum of colors so that the Celtic knotwork of the bias tape would take center stage rather than the fabrics that simply help bring out the details of the design.  


Faery Wings

I didn't finish my project today, so here is one I finished last month. I am in a contest based on the Hunger Games for crafters. For this round, we had to create something for a faery court.


I have been wanting to make a pair of fairy wings for a while now, but never had a real reason to get it done. Originally I had been thinking of playing around with heat-shrink window film and wire, but I am glad that all my happy accidents lead me in a different direction. It began when I went to the shed to look for wire. I had none, but on my way back into the house I saw the bucket full of mesquite branches I had recently harvested from my dad's windfall tree. I planned on making baskets with the branches, but they weren't pliable enough to do baskets. However, they were just right for wings.


I had florist tape on hand, so I began wrapping the wings in white florist tape. Then I experimented with the plastic and some translucent stained glass paint. The paint looked okay, but it just looked too fake to have branches covered in plastic. I thought back to a time when I made a dream catcher from a teardrop-shaped branch and went digging through my yarn. Rather than doing a dream catcher knotted pattern, I tried crocheting it to make a more dragon-fly like pattern.
Since there were  12 different "winglets" to fill with design, I varied the theme of the design, adding in glass beads resembling pearls on the upper wings and switching to a yarn that was white with metallic silver filament for the bottom.


When I finished the four wings, I cut a piece of aspen to create the harness. I chiseled off one side so it was flat, then I drilled 4 holes for the wings, 2 holes for the harness straps and 1 hole in back to make it hang on a wall as art when I wasn't wearing it. Then I used hand carving tools and a dremel to custom carve each hole to best fit each wing's branches. When everything was carved, I went back and gave the aspen piece an over-all sanding.


I made a strap from some green twill tape and sewed it so that it fits around my shoulders and rests on my upper back. I then used florist wire and more florist tape to secure the wings to the wood.  I added in some silk flowers and a few feathers to complete the look. This project took roughly 30 hours to complete.


They look nice on my wall, but I am selling these at the comic con this weekend. They are too hard to ship, so if they don't sell, I will be hanging them back on my wall.